Best Places to Get Swimming Lessons in Cincinnati in 2022

Swimming lessons in cincinnati

Summer is just around the corner. The weather is heating up and pools are starting to open. Going for a relaxing swim to cool off has never sounded better. However, are you confident in your swimming skills? What about your kids? Would you be able to prevent yourself or your child from drowning? It might be time to look into swimming lessons in Cincinnati.

According to a survey by the American Red Cross in 2014, 54% of all Americans either don’t know how to swim or don’t have all of the basic swimming skills. This frightening statistic means that over half of the population might not be able to prevent themselves or their children from drowning. In the same survey, only 40% of parents of children ages 4-17 report that their child can perform all five of the basic swimming skills. Essential swimming skills include being able to enter the water and resurface without assistance, controlling breathing, floating, turning, and moving to safety in the water and exiting the water.

Learning to swim and knowledge of basic water safety are imperative if you or your children are going to be around the pool this summer. Fortunately, it is never too early or too late to learn to swim. Many places in Cincinnati offer swimming lessons for babies, children, teens, and adults. And best of all, some of them are free. Read on to learn where you or your child can learn to swim in Cincinnati this summer.

Free Swimming Lessons in Cincinnati

People may not seek out swimming lessons for themselves or their kids because they’re under the impression that lessons might be too expensive. This is not the case. There are several programs in Cincinnati that offer free swimming lessons to people of all ages.

The Cincinnati Recreation Commission has partnered with the American Red Cross for its annual “I CAN SWIM!” program. This program is designed to help swimmers of all ages begin, develop, and refine swimming skills, regardless of their ability to pay. The I CAN SWIM program is dedicated to the memory of 10-year-old Cameron Jeff and his 8-year-old brother Bryce, who tragically drowned in a neighbor’s backyard pool because they were unable to swim. This program honors their memory by teaching kids and adults to swim in an effort to prevent more drowning deaths.

I CAN SWIM opened their registration for 2022 on May 2nd, and sessions begin in June. Session 1 is from June 13th-July 9th, and Session 2 is from July 11th-August 6th. They offer 3 levels of lessons: Parent & Child (Ages 6 months-3 years), Levels 1-5 (Ages 4 years-17 years), and Adult & Senior lessons for anyone 18 or older.

Ziegler Park also offers free swim lessons as part of the P&G EverybodyIn program. Registration for 2022 is open now, and sessions begin on June 6th. Ziegler Park offers lessons for all levels and ages, including Toddler & Parent lessons, Beginner Child Lessons, Intermediate Child Lessons, and Adult Lessons.

Swim Lessons at Membership Locations

Several membership organizations, such as health clubs, offer swimming lessons for free or for a reduced fee for people who subscribe to a membership. These class sizes may be smaller than free lessons, but it will depend on the location and type of membership.

The YMCA of Greater Cincinnati offers swimming lessons to members year-round. These lessons are delivered in sessions that last 6 weeks and are offered for multiple swimming levels and age ranges. The cost for a 6-week session for YMCA members is $60 per swimmer. Lessons are available at several branches of the YMCA. Session 4 is accepting registration now and will last from May 15th-June 25th, and session 5 opens for registration on June 5th and will span from June 26th-August 6th.

TriHealth also offers reduced-cost swim lessons for members of all ages. For $75, members can enroll their children in Aquababies (Ages 6 months-3 years) or Preschool Lessons (Ages 3 years-5 years). Members can also enroll in adult swim lessons. You can inquire about the next session of TriHealth classes on the TriHealth website.

Coney Island offers 4-week swim lesson sessions for season pass holders at several different levels. They offer classes for infants starting at 6 months of age, up through beginner, intermediate, and advanced lessons for older children. Sessions begin on June 6th, with registration fees due by June 1st.

Paid/Open to the Public Swimming Lessons

Finally, a number of organizations offer paid swim lessons to members of the community. From the previous section, the YMCA and TriHealth offer lessons to general community members without memberships, for a higher cost. The YMCA lessons are $120 for community members, and TriHealth is $100 for community members.

The Goldfish Swim School has locations in Anderson and West Chester and is well-known for its wide variety of lessons for children under 12. They have small class sizes, with a 4:1 student to instructor ratio for individualized, dedicated instruction. Classes are offered year-round with flexible time slots to fit into busy schedules.

The British Swim School also offers paid lessons for children at its three locations in Crestview Hills, KY, Cincinnati, and Springdale. Children as young as 3 months can get familiar with the water in classes of 6 or fewer students. The British Swim School also offers courses for adults at select locations and courses for students with disabilities.

Swim Safely, Cincinnati

Swimming is a fantastic summer pastime in Cincinnati, but it’s important to know how to do so safely. With the wide variety of swim lessons available to the public in Cincinnati, children and adults alike can master the water in a few short weeks. We hope our list was helpful for you and your family, and that you can take advantage of the 2022 summer offerings.

Once your family is swim-ready, you might consider adding your very own pool to your backyard. After all, practice makes perfect! Get in touch with our pool installation experts if you’ve been thinking about installing a pool in the future. We’d be more than happy to go over estimates and installation timetables with you.

The Ultimate Grill Maintenance Guide: 2 Processes for Gas and Charcoal Grill Maintenance

Grill Maintenance Guide

Warmer weather is just on the horizon. This means the return of barbecues and cookouts with your favorite backyard accessory—the grill! My mouth is watering right now, just thinking about it!

Chances are, you haven’t thought about grill maintenance since the end of last summer. It’s not fun to grill in the snow and ice in the dead of winter, after all. Has your grill been sitting untouched for months? You’ll need to give it a thorough once-over and a good cleaning before you invite the neighbors over for burgers. Throughout the season, it’s also a good idea to keep up with regular grill cleaning and maintenance. This way your grill will stay in top shape all year long.

Whether you have a gas grill or a charcoal grill, this is your complete guide to cleaning and maintaining your grill all year long. Read on for the differences between the two grills and our comprehensive list of cleaning practices.

Gas Grill Maintenance

Gas grills use propane or natural gas as a fuel source. They are more expensive than charcoal grills, but they are easier to clean, maintain, and are faster to cook with. But just because they’re easier to maintain than charcoal doesn’t mean they don’t require any maintenance!

Pre-Season Cleaning and Check

If your gas grill has been in storage for the winter, take it out and inspect it thoroughly. Remove any spiderwebs or other insects that might have made their home inside the lid or grates.

If you didn’t clean off your grill before storing it, give it a good scrub before firing it up for the first time. Use a new, wire grill brush to brush off any debris from the grates. If your grill is extremely dirty, you’ll want to give it a thorough cleaning. If your grill grates and barrier are made of aluminum, you can remove them to soak them in hot, soapy water to remove dirt and baked-on food. Make sure everything is fully dry and back in place before you fire it up.

For cast-iron grates, the cleaning method will be different. Cast iron can rust if the grates are not dried properly. Instead, heat up the grill for 15-20 minutes to burn off any residue that is stuck to the grates. If anything is left over, use your grill brush to scrub the remaining residue off.

Next, check the hose for leaks. Connect the propane tank, turn on the valve, and then spritz the hose with a mixture of water and dish soap. The hose could have a leak if bubbling occurs.

Regular Cleaning/Maintenance

Regular cleaning and maintenance throughout the season are the keys to keeping your gas grill in top shape. Each time you fire up your grill, follow these steps to get the best possible experience:

  • Pre-heat the grill for 10-15 minutes. This will loosen food debris that could be stuck to the grates.
  • Use your wire grill brush to brush debris off the grates.
  • Empty the drip tray.
  • Regularly check the inside of your lid for carbon buildup. Brush off any flakes that have accumulated.

End of Season Cleaning and Check

If you’re planning to put your gas grill away for the winter, your end-of-season maintenance will look very similar to your pre-season maintenance. Scrub any residue from the grates with your grill brush. Then you can thoroughly clean your grates with the method that best fits your grate material. Either remove aluminum grates and the drip tray to soak in warm, soapy water or pre-heat and scrub tough debris from cast-iron grates. Brush out the interior of the grill to remove any residue, as well.

Before packing your grill away for the winter, you should inspect the burners to make sure they aren’t clogged. With the grates removed, turn on your gas grill and watch the flames that come from the burners carefully. If the flames are uneven, your burners need to be cleaned. Turn off the grill and let it cool completely before removing the burners. You can then use a pipe cleaner or small, wire brush to clean the ports along the side of the burners. Gently tap them on the ground to remove debris from inside the burner.

You should also wash the exterior of your grill before putting it away for the winter. Once everything is thoroughly dry, reassemble your grill, disconnect the gas supply, and store the grill under a cover in a cool, dry place until the next grilling season. And don’t forget to store your propane tank separately in a safe, ventilated area!

Charcoal Grill Maintenance

Charcoal grills, just like the name sounds, use charcoal as a fuel source instead of a gas like propane. They tend to be less expensive than gas grills, and some grill enthusiasts will say the food will taste better when cooked with a charcoal grill. They do tend to take longer to heat up and temperature control is more finicky. However, if you have the patience, owning a charcoal grill can be rewarding. But you still have regular maintenance tasks to perform each season to keep your charcoal grill in top shape.

Pre-Season Cleaning and Check

Bring your charcoal grill out from storage at the beginning of the season and inspect it for debris. If your grill was put away dirty at the end of last season, this is where things will start to differ from the gas grill pre-season maintenance.

Build a fire in your grill and let it burn for about a half-hour. This will bake off any gunk stuck to the grates or inside of the grill. Use your wire grill brush and a scraper to remove any remaining debris off the grates. Turn off your grill and let it cool completely before giving it another, thorough brushing and scraping.

If your grill grates are made of aluminum, you may also want to soak them in warm, soapy water for a couple of hours. While the grates are soaking, wash the inside of the lid and bowl with soapy water and a sponge. Rinse everything thoroughly and reassemble your grill.

Finally, before firing up your grill to cook for the first time this season, you’ll want to grease the grates with vegetable or olive oil to prevent food from sticking to the grates. You could also use bacon fat or cooking spray. Just be sure to do this while the grill is cool so that the lubricant has time to dry.

Regular Cleaning/Maintenance

Keeping your charcoal grill clean throughout the season is the best way to maintain it. Follow these steps below each time you grill and periodically throughout the season for maximum effectiveness:

  • Empty the ash receptacle regularly to prevent accumulation in the air vents. Clogged air vents can make it more difficult to control the grill temperature.
  • Clean the inside of your lid every few weeks to prevent ash, smoke, grease, and other buildup from accumulating. Use a paper towel when the grill is cool to wipe off the excess buildup.
  • Clean the cooking grate after each use while the grill is still warm with your grill brush. It’s easier to remove food accumulation when the grates are still warm.
  • Oil the grates before putting your grill away after cooking. This will prevent food from sticking the next time you fire up your grill and prevents rust.

End of Season Cleaning and Check

Like with a gas grill, your end-of-season maintenance will look like your pre-season maintenance. Remove all the ashes from your charcoal grill and give it a thorough cleaning. Heat the grill to burn off the residue from cast-iron grates. Soak aluminum grates in warm, soapy water. Then wash the bottom of the bowl and the grill lid.

When everything is dry, replace the grates.  Make sure the grates are well-oiled, then cover your grill with a weatherproof cover and store it in a cool, dry place. When you bring it out at the start of next season, your pre-season maintenance will already be half-done!

Fire It Up, Grill Master!

Whether you’re cooking with a gas grill or a charcoal grill, keeping up with maintenance throughout the season is the key to delicious cookouts every time. Are you looking to add a new grill to your patio this year? Or do you need help with supplies and maintenance? The grilling experts of Cincinnati Pool and Patio are always here to help. Check out our grill selection online or contact us with questions!

Spring Has Sprung: 7 Easy Tips to Prep Your Patio this Year

Prep Your Patio for Spring

It’s not quite spring yet, but warmer days are within sight. Soon the birds will be singing, and the sun will be shining. It’ll be the perfect time to get outside and enjoy the weather from the comfort of your patio or porch!

However, winter can wreak havoc on your outdoor space. Months of being subjected to the elements can make even the sturdiest patios in need of TLC. But with a little elbow grease and some redecorating, your patio will be ready for springtime entertainment in no time. Follow our guide below for the best tips to prep your patio for spring!

1. Inspect for Winter Damage

The first step to preparing your patio for spring is to inspect for damage from the winter. Snow and ice can cause cracks, chips, and other damage to decking and patio pavers. Look around carefully to see if there is any damage on your patio that needs attention.

For wooden decking, inspect for cracked/chipped boards and loose railings. You’ll also want to look carefully for signs of rot or mildew in the wood. For stone or tile patio pavers, look for chips, cracks, or loose stones. Depending on the state of your patio, you may need to do some extensive repairs before you can use the space.

2. Spring Cleaning

After you’ve inspected your patio and repaired any damage, it’s time to give everything a thorough cleaning! For wooden decking, use a soft-bristled brush to scrub away any dirt or grime. Soft bristles will avoid damaging the wood. Then you can use a pressure washer on the lowest setting to rinse your deck and blast away the rest of the gunk from the winter.

For stone patios, make sure to remove any weeds that have grown up through the cracks. Then you can clean your patio stones with a mixture of warm water and vinegar and a stiff-bristled brush. You can also use a pressure washer for more stubborn stains and grime.

While you’re at it, your patio furniture probably could use a good rinse. If you’ve had your furniture stored over the winter, it might be dusty or grimy from disuse. Use the garden hose or a pressure washer to give life to your furniture. You should also toss your patio chair covers in the washing machine to remove stains and get everything clean for the spring.

If your furniture is looking a little worse for wear, consider replacing it with some of our large selection of patio furniture.

3. Create Shade

While soaking in the sun is one of the best parts of being outside, you’ll want to have a place to escape if it gets too warm. Add a sturdy patio umbrella to your patio or utilize fabric and a pergola to create a covered shade structure. You can also hang curtains from your patio or pergola that you can draw in the heat of the afternoon sun. Curtains will also add privacy from nosy neighbors!

4. Prep the Essentials

What do you use your patio for the most? Are you a grill master? Do you like to relax in the shade with your favorite book? Do you entertain the entire block? Whatever your goal is for your patio, make sure you have the right equipment to do it!

For grilling, have an adequate supply of propane or charcoal. They should be placed within easy reach of your grill. You should also have a food prep station and a place to put all your utensils when you’re not using them.

Create the ultimate relaxation station for your reading nook by preparing a side table next to your favorite patio chair. Consider a side table with hidden storage so you can keep your books or cozy pillows safe from the elements when you’re not outside.

If your patio is the summer barbecue destination, make sure you’ve got plenty of seating. Add a rug or a fire pit for a focal point and you’ll easily have the best patio in the neighborhood.

5. Make it Cozy

Rugs, pillows, throw blankets, and other comfort items will make your patio more inviting. Choose warm, vibrant colors that pop for spring.  Make sure your comfort items are within easy reach. You can also add string lights, lanterns, or flameless candles to your patio space to create a cozy glow once the sun goes down.

6. Don’t Forget the Storage

You don’t have to settle for plain, ugly storage bins to keep your deck pillows and other items safe from the elements. There are plenty of options on the market to add functional, stylish storage to your patio space. You can choose decorative deck boxes, storage cabinets, or tables with hidden storage. The options are endless, so you can easily find something to fit your outdoor aesthetic.

7. Add Color

Finally, you’ll want to breathe some life into your patio space. We already talked about colorful pillows, blankets, and rugs, but what about other options? Plant life is a fantastic way to add color and decoration to your patio this spring.

Once it gets warm enough, visit your local nursery to choose blooms that match your outdoor décor. Some favorite springtime plants are daffodils, violas, hyacinths, and tulips. Plant them in some fun, decorative outdoor pots or planters and you’ll have the most colorful backyard on the block!

Spring Has Almost Sprung!

With this extensive list of springtime patio prep, your backyard is sure to be your favorite destination this year. Getting outside also has a whole host of health benefits, including increased mood, and more Vitamin D production. So, you have even more incentive to get your patio space perfect.

Are you looking at your patio and  thinking it needs a facelift? You can always stop by Cincinnati Pool and Patio to discuss complete outdoor renovations with our backyard experts. Or you can spruce up your existing patio with some of our fantastic selection of patio furniture. Whatever the state of your patio, the professionals with Cincinnati Pool and Patio are always here to make your backyard great.

8 Fun Ways to Enjoy the Holidays Outdoors This Year

Candy Cane Outdoor Activity

The holiday season is upon us. A chill is in the air, presents are being purchased and wrapped, and it’s a time to spread good cheer to everyone around us. You might think that the shorter days, longer nights, and colder weather mean that we have to retreat indoors for our holiday festivities. Not necessarily!

There’s plenty of ways to enjoy the holidays this year right from your very own backyard! Even if the weather outside is less than stellar (or if it’s, dare I say, frightful), that doesn’t mean you and your family can’t bundle up and get some fresh air. And who knows! Some of these outdoor activities could become favorite holiday traditions.

So, without further ado, read on for Cincinnati Pool and Patio’s top 8 picks for holiday activities you can do outdoors!

1. Roast Chestnuts (Or Marshmallows!) on an Open Fire

Roasting marshmallows and making s’mores seems like a summer camping activity, but why should it only be limited to the warmer months? If you have a firepit in your backyard, the holidays are the perfect time to fire it up and toast some delicious marshmallows. If you get adventurous, maybe try roasting some chestnuts or other tasty fire-roasted treats! No firepit? That’s okay! A properly maintained bonfire will work just as well. Just be sure to follow all fire safety procedures!

2. Decorate Your Door with a Homemade Wreath

A Christmas or Holiday wreath is the perfect way to add some holiday cheer to your front door. Of course, you can purchase a wreath from any store, but did you know you can also make a homemade wreath with things you can find in your own backyard? Check out this tutorial on how to make a wreath with everyday items found in nature, and get the whole family involved with this new tradition.

3. Candy Cane Scavenger Hunt

Are the kids going stir-crazy cooped up inside? How about sending them to the backyard to hunt for delicious candy canes? Reminiscent of hunting for Easter eggs left by the Easter Bunny, hide a package or two of candy canes around the yard and have the kids try to find them all! Have them fill up a basket or a bowl and see who can find the most! Of course, everyone’s a winner when they get to enjoy the tasty treats they found.

You can also do this scavenger hunt with other, non-edible objects too, like small toys or paper decorations.

4. Feed the Birds

There are plenty of bird species native to Cincinnati that don’t migrate over the winter months. Show them a little love by putting out commercial bird seed into a feeder or on the ground and see how many different birds you can spot.

5. Decorate an Outdoor Tree

Who said you had to bring your Christmas tree inside? If artificial trees aren’t your thing and you aren’t fond of the idea of vacuuming up pine needles constantly, then take your holiday cheer outdoors! Find some ornaments that are environmentally friendly and bring your lights outside to decorate a tree in your own backyard! No evergreen trees? No problem! You can still create a fantastic display on any tree (or other plants) in your backyard that will be the envy of your neighbors.

6. Sell Hot Chocolate

During the summer, kids’ lemonade stands are on every block. Why not bring that childhood business staple to the winter months with a hot chocolate stand, instead? Bundle up the kids, have the parents boil some water and make it a whole family affair that will entice the whole neighborhood! Play some holiday tunes and set out some cozy lights for some added atmosphere and you’ve got the recipe for a winter block party.

7. Play in the Snow

Of course, who could forget about everyone’s favorite wintertime activities? When the white stuff hits the ground and sticks around, it’s time to break out the snow gear and play! A couple of our favorite snowy pastimes:

  • Build a snow fort or an igloo.
  • Have a snowball fight! Loser has to shovel the driveway!
  • Build a snowman (or a snow dog).
  • Go sledding or snowboarding.
  • Make snow angels.
  • Draw pictures or write your names in the snow.
  • Make snow ice cream! (Here’s a great recipe we love!)

The snowy possibilities are endless! Even just going for a walk when the snow is falling can be a peaceful activity.

8. Soak in a Hot Tub

Finally, if you’re looking to stay warm this holiday, why not turn up the heat with a relaxing soak in one of our hot tubs? Maybe start a tradition of a family soak with hot cocoa for your holiday celebration. You can even make your patio an even cozier holiday getaway by adding twinkling patio lights and an electric space heater, so your toes don’t freeze when it’s time to get out of the water.

Make sure you limit your soaks, though. If your water is above 100℉, you should only soak for up to 15 minutes, so you aren’t at risk of overheating. If your water temperature is a little lower, however, you can stay toasty for a little longer.

Happy Holidays from Cincinnati Pool and Patio

The holidays are a time to gather with family and friends to enjoy one another’s company and the feeling of togetherness. Make your next gathering unique and special with a customized outdoor gathering setup from Cincinnati Pool and Patio. Our outdoor designers can bring your vision to life for a perfect backyard or patio that will be your family’s go-to for year-round fun. Why not put a twist on the holidays and use this list to make memories outdoors instead of staying cooped up inside around the fireplace?

For expert backyard design, hot tub solutions, or other outdoor related help, you can get in touch with Cincinnati Pool and Patio here, or stop into our store to see all that we have to offer. And from all of us at Cincinnati Pool and Patio, have a very happy holidays and a Happy New Year.

9 Ways to Utilize your Patio in Winter

9 Ways to Utilize your Patio in Winter

A beautifully decorated patio can be an integral extension of your home. During the warmer months, your patio is the focal point of your entertainment. Backyard barbecues and time spent with friends and family make for some great memories. But what about when the weather turns colder? Are you relegated to be stuck indoors until the snow melts? Not necessarily. It might take some innovation and elbow grease, but you can easily turn your patio into an all-seasons, outdoor refuge. Check out these 6 tips below to make your patio a winter destination.

1. Heat Source

When the temperatures dip to around freezing and there’s snow in the forecast, having a source of heat is the number one priority for making your patio comfortable. A fireplace or a fire pit as the central focal point of your patio space is the easiest way to make your space cozy. It will radiate heat out into the space and provide a place for your family and friends to congregate. You can also utilize electric heaters. Spread them throughout the space alongside or instead of fire for an evenly heated area. 

2. Walls or Foliage

It can get awfully windy in fall and winter. Nothing makes it harder to enjoy your outdoor space than harsh winds blowing your things around and dispersing your heat. Add some windbreaks to your space in the form of walls or foliage to insulate it from the elements. You can build walls to create an enclosed patio or erect clear barriers for an unobstructed view of your backyard. Planting trees or bushes instead can add a landscaping touch. Coniferous or evergreen trees stay green year-round, and are easy to take care of and trim to fit your space. 

3. Roof

Unless you want to be sitting in snow, covering your patio space with a roof is a must. Depending on your budget and style, there are many different options for roofing. You can build a detached pergola-style structure and cover it with weatherproof fabric, or go fancy with an insulated roof complete with a ceiling fan to blow hot air downwards. Whatever you choose, make sure the roof is sturdy enough to withstand snow and ice. 

4. Sturdy Decór

When it comes to decorating your outdoor space, you’ll need furniture that withstands the elements. Investing in furniture that has sturdy design will keep your space looking nice for years to come. Wood or metal frames hold up the best in rain or snow. Any upholstery should be out of weatherproof fabric, such as Sunbrella, to avoid getting damaged by bad weather. You could also look into heated furniture for an extra boost, depending on your budget. 

5. Warm Accents

Now that you have the basics of your winter outdoor space, it’s time to flesh it out with some personality. Decorate your furniture with accent pillows in weatherproof covers to make your space inviting. Using warm color schemes, such as reds or oranges, can also add brightness and warmth. Utilize thick, sturdy curtains for added wind protection and to make the space more homey. Cozy throw blankets will provide extra warmth on particularly chilly days. Look for wool or sherpa-lined blankets as these are warmer. Any fabrics that aren’t able to withstand the elements should be taken inside or stored when not in use. You can purchase a deck box or decorative table with a secret compartment to store your outdoor accents right where you need them.

6. Lighting

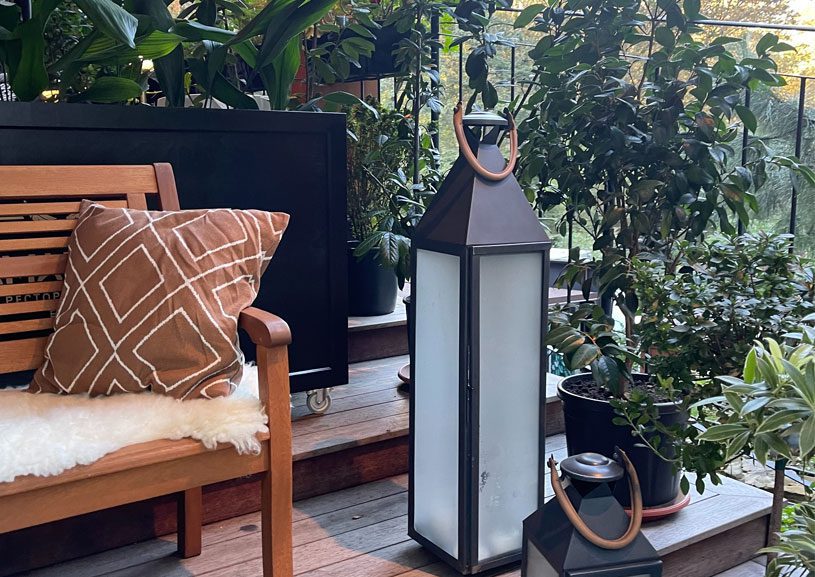
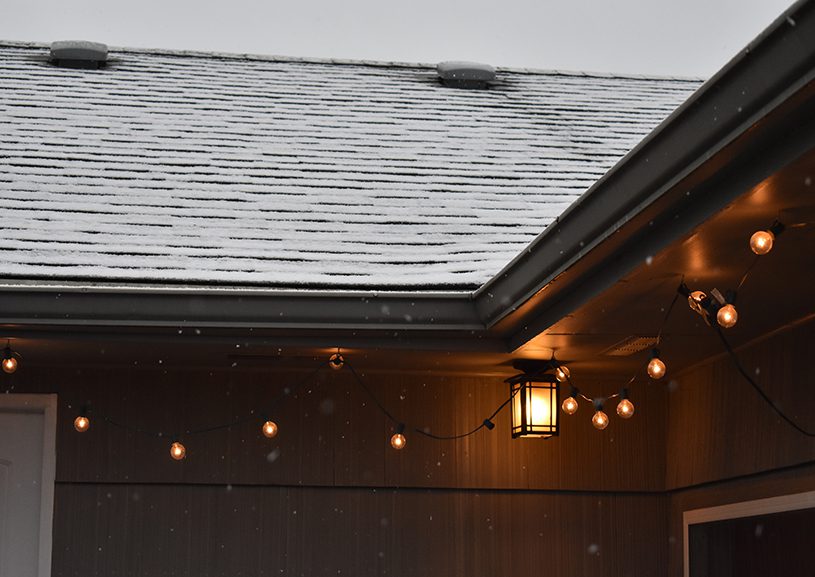
There are less hours of daylight during winter, so you’ll need to make sure your outdoor space is adequately lit to make the most of it. A little goes a long way, so a few lanterns or lamps spread throughout the space will provide an even glow. There are also heat lamps you can purchase for added warmth for your space. Candles placed on end tables and throughout your seating area can also give your space a romantic glow. Stringing up twinkle lights or even Christmas lights along the top of your covered space can give the entire patio a whimsical feel and cheer up even the most dreary days. 

7. Plants

Just because the temperatures dip to freezing and below doesn’t mean that you still can’t enjoy nature on your patio. There’s a wide variety of plants that thrive in cold conditions and even bloom during the winter months, so you can add a pop of color to your patio with very little effort. Winter Heath, Cornelian Cherry and Snow Drops will even survive through the ice and snow, so plant some in late summer or early fall to add that special final touch to your outdoor space come winter.  

8. Food & Drink

Backyard barbecues aren’t just for the summer months. What better way to enjoy your space than with a delicious grilled meal? With a little bit of prep to keep your grill space usable, you can update your menu to include heartier dishes and station a heat lamp near the grill to keep you toasty while you cook. You can also break out the hot cocoa or hot apple cider to keep your guests toasty and hydrated. You could even try some winter-themed cocktails if you want to keep the party going all night long.

9. Fun & Entertainment

With your space decked out for maximum winter fun, you’ll need to add entertainment options. An inflatable projection screen with a mobile projector makes for a weatherproof, impromptu movie night. And what winter space would be complete without a hot tub to end the day with a nice soak? They can be pricey, but with the right maintenance, you can fight the winter chill and relax in your very own private winter getaway.  

There’s still a lot of time until spring, but that doesn’t mean you have to wait to use your outdoor space! If you’re thinking of renovating your patio space into an all-seasons getaway, contact us to speak with our experts. We can discuss your vision and help you make it a reality! 

5 Tips to Enjoy Your Backyard in Winter

backyard

Winter is here and no matter how much you are dreading the cold weather, there are always ways to continue to enjoy your backyard in winter.

For many homeowners, the backyard is a staple of summer living that may fade away once the snow starts to hit, but it doesn’t have to be that way.

Winter takes away the daylight, the warmth and replaces it with a whole lot of snow. The key to enjoying your backyard in winter is to make up for what Mother Nature took away while making the most of what she provided.

Here are 5 Tips to enjoy your backyard in winter

FIND A NEW SOURCE OF LIGHT

In winter, the days are short and daylight is very hard to come by. A practical way to address this issue is by going with a neutral holiday light set and using it all winter long. Permanent lighting in your backyard is a great option to add extra light.

FIND A NEW SOURCE OF WARMTH

With temperatures plummeting, you need heat to make your backyard more hospitable. There are a variety of options on the market that can address this concern. These options include purchasing patio heaters, having a fireplace installed or even getting a hot tub, which is more affordable now than ever before. These pieces are well complemented by other winter-friendly additions such as wooden furniture and gazebos. You can enjoy the still peace of nature while thawing out by an outdoor fireplace or a fire pit. Bring the blankets and the hot chocolate for a relaxing time with your family or friends.

ENJOY THE SNOW

When it snows, you often dread shoveling your driveway, cleaning off your car and dealing with other drivers on the road. Why not take a break from shoveling and go have some fun in your backyard? You can build a snowman, construct an igloo or snow fort and have a snowball fight.

Therefore, you might as well make the most of the winter by enjoying the one gift it provides that many people don’t actually mind, the snow. The opportunities for fun are limitless, whether you want to make snow angels, a snowman, or even have a snowball throwing contest (where you aim at targets, not at each other!).

One great thing you can do year-round on your patio is grilling. Don’t let the bitter cold and snow stand in your way from eating delicious steak, chicken, and burgers. Just remember to prepare and make sure that your grill has fresh dry charcoal or a fresh tank of gas.

RELY ON WINTER PLANTS

Spring is the season of blooming for most plants, but there is still some plant life out there that can survive and thrive in winter. So head over to your local nursery to learn more about cold-resistant and winter-blooming plants, shrubs and perennials that can add some much-needed vibrancy to your backyard this winter. Look out for Red Osier, a red winter shrub, and Purple Coneflower, a perennial, two options that will compliment any winter garden.

WARM UP WITH A HOT-TUB

Why leave the hot tub to the ski resorts, when you can have one in your own backyard? Your hot-tub can provide a warm relaxation station in your backyard. Be sure to wear a winter hat in the tub. A hat will actually help you regulate body temperature in the tub, and will protect your head from any winter air.

Have any questions about getting your backyard ready for winter? Then contact us here!

The Benefits of Outdoor Kitchens

outdoor kitchens

The Benefits of Outdoor Kitchens

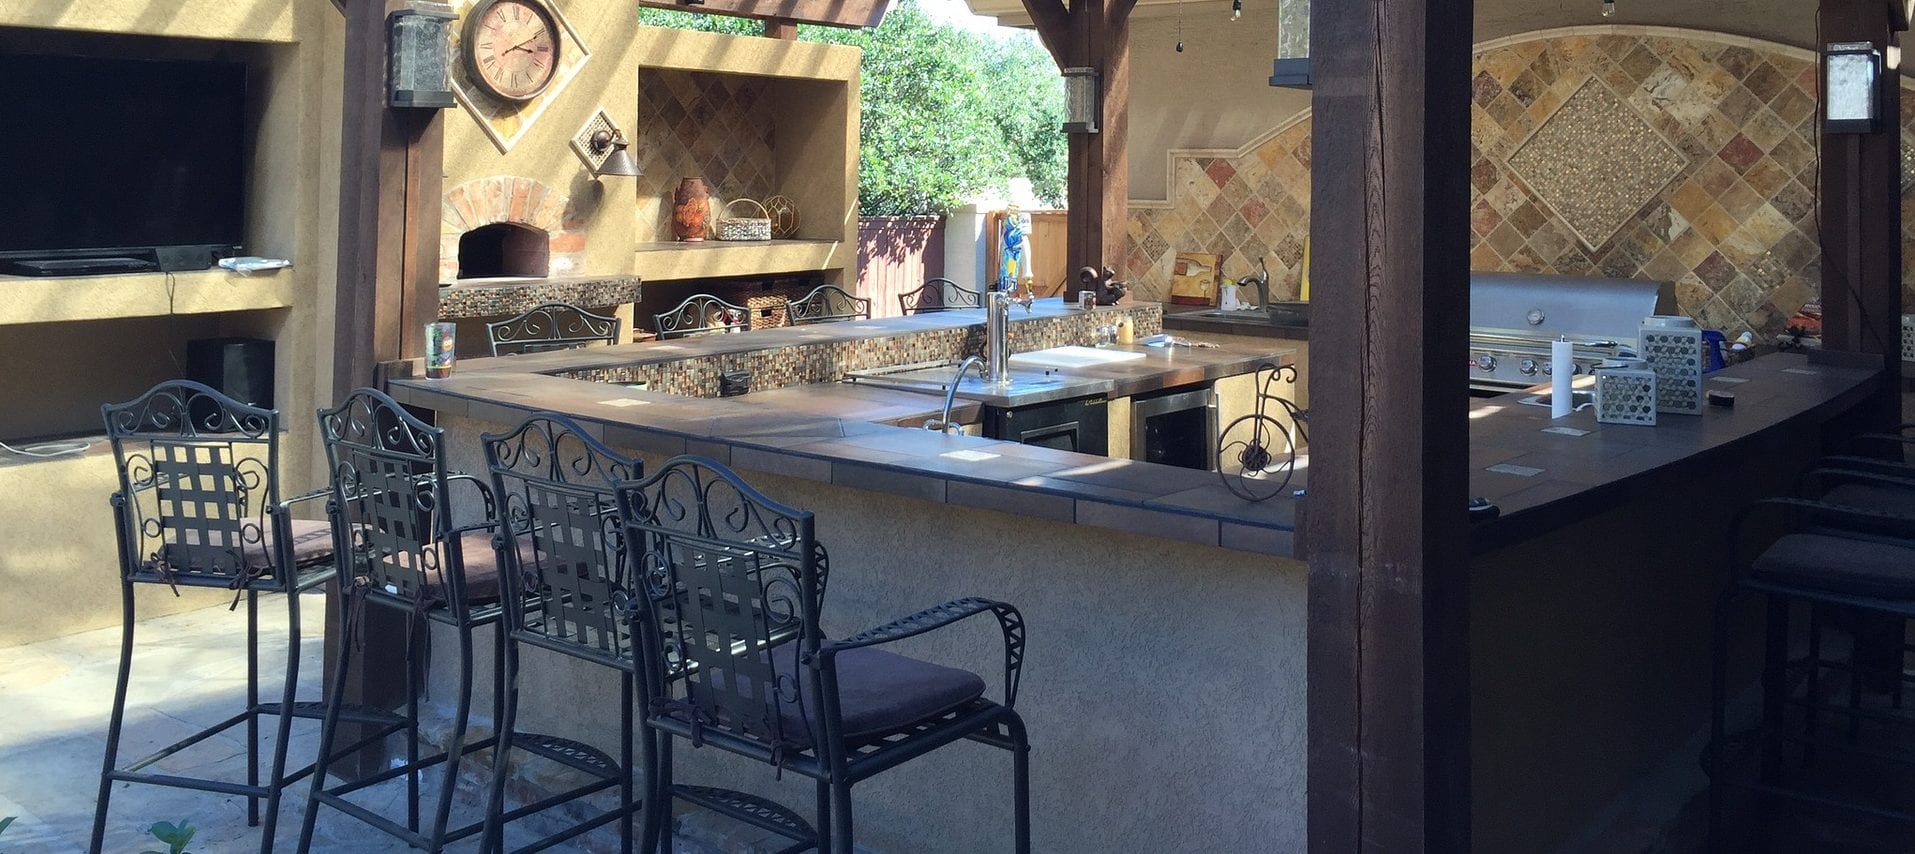
Have you considered getting an outdoor kitchen for your home? Outdoor kitchens can be a great addition to the right home.

We’re going to discuss all of the benefits that come with installing a kitchen in your backyard or patio arrangement.

Increased Home Value

Outdoor kitchens are generally thought to be a luxury item, that can make your house more marketable. Outdoor kitchens have a higher rate of return on your investment, like constructing a garage door in comparison. In case you don’t have a huge yard, make sure you take into account the dimensions of your kitchen. Prospective homebuyers enjoy having an open area which isn’t consumed by structures, like pools and kitchens.

More Living Room

If you don’t have a large gathering space inside your home, an outdoor kitchen is a great option for you. If you’re hosting a party, guests will be able to have more space to relax on the patio and lounge around the outdoor kitchen

Whenever your outdoor patios are coupled with an outside kitchen, food prep becomes sort of a group activity. Therefore, no one gets stuck inside cooking while everyone else is drinking on the patio.

Maintain The Smell of Cooking Outdoor

Another benefit of having an outdoor kitchen is you can keep the smells of grilling or charring foods outside. You won’t have to deal with the smokiness or worry about your house smelling like whatever you’re cooking in the summertime.

An outside kitchen retains cooking grease, odors, smoke, and heat outside–a big plus in sweltering summertime.

Save on Utilities

Cooking outside can also help you save money and energy on your bills. When you cook outside, your A.C. won’t have to work overtime to deal with the heat in your kitchen.

Design Factors of Outdoor Kitchens

When designing your outdoor kitchen, you’ll want to put a lot of time and thought into what exactly you want and need.

A great first place to start is thinking about the ventilation. You’ll want to create a way for smoke to rise and dissipate from the area.

Another priority you should think about first is the size of your patio and the measurements of the accessories. You’ll want to make sure you have enough space for the items, and for anyone on the patio to fully relax.

When planning your layout are some developments to consider:

All About The Grill:

First, you’ll have to think about the size of the grill you want. This solely depends on how many people you want to cook for, what you’re going to cook, and how often you’re going to use the grill. If you plan on hosting large parties and cooking for every guest, a bigger grill is more your style. Though if you just want to cook for your family, and medium to a smaller size will be fine.

You can also decide if you would like your grill to be connected to the ground, or if you would like to be able to freely move it around. This will also be dependent on the size of the grill you need.

Countertops:

When thinking about countertops, you need to think: “How much prep space do I need?”  If you plan on preparing a lot of recipes outside, you’ll want a lot of space. If you’re unsure, get a countertop that’s easy to change out or add to.

Constructed Cabinets:

Cabinets are a great convenience to have outside. With this addition, you won’t have to run in and out from your house to retrieve extra silverware or plating. You can also invest in cabinets that you can lock if you’re worried about theft.

Lighting:

Lighting is what separates the good, bad, and ugly outdoor kitchens. Proper lighting will ensure that you can use your outdoor kitchen at any time you want. Floor lighting, fairy lights, LED, and lamps are all great options.

Lighting can add ambiance and will ensure your guests will be able to see all the delicious food you cook them.

Sink:

Having an outdoor sink can be convenient for you and your guests. You can wash and rinse any outdoor plates right outside, or allow your guest easy access to water refills.

The only limitation you have to a sink is making sure you’re able to connect it to your water source.

Refrigerator:

Outdoor refrigerators are a great item to have that will completely separate your outdoor and indoor kitchens. You can store the ingredients you want to use outside there, and you can reduce the number of times you have to run back inside.

You can go with mini or full-size options, it all depends on your needs and wants.

Floors:

Your best option for flooring is to go with a material that will be able to stand the elements of being outdoors. Concrete, brick natural stone, and tile are great options that can look good and last.

If you have any questions about how to create your outdoor kitchen, don’t hesitate to contact us here. 

10 Ways to Freshen Up Your Backyard for Spring

backyard

10 Ways to Freshen Up Your Backyard for Spring

Spring has arrived and it’s time to bring the indoors out with cozy features. Your backyard is a continuation of your home which showcases your style and personality. Extend your time in the fresh air with outdoor seating areas that feel as cozy as your couch.

Here are some of our favorite tips to freshen up your backyard in time for spring.

Define Your Backyard

Deciding what spaces you need—dining area, cooking area, shady lounging area, play area—and clearly defining them can make a big visual impact on a yard. Your design is reliant on the space of your backyard, but you don’t need a large backyard to have a great outdoor space.

Even in the smallest backyard, you can update your space in a fresh and easy way. Doing this can be as inexpensive as repositioning the furniture you already have. Or reupholstering new fabric on your outdoor lounge and chairs.

Create an Outdoor Living Room

A living room forms a gathering place in your home, so why not have the same outdoors? Outdoor loveseats, chairs, and a coffee table are simple elements that are generally inexpensive.

Whether they’re looking for a place to eat or a comfortable spot to unwind, a mix of seating options will keep everyone happy. When you have a variety of comfortable seating choices, it adds flexibility and openness to your space. A pergola acts as a roof to create a defined space, just as your walls do indoors. With the addition of brick flooring, comfy furniture, and a warm fireplace, you’ll feel right at home.

Effortlessly blend your indoor and outdoor space with an open-air living room. Comfortable seating, an outdoor bar, and floor-length curtains will make space feel like an extension of your home.

Focus on Color

Your backyard is a continuation of your home, so your outdoor design should be too. A coordinating color palette allows your design to flow both indoors and out with accent colors making each space unique.

Create a welcoming outdoor retreat by incorporating accent pillows to your backyard design. Mix and match patterns and colors to perk up your outdoor furniture. Don’t be afraid to go bold, pillows are easy to change.

Add Some Heat

With beautiful views and a custom outdoor space, your deck is the perfect place to enjoy the spring air. Add a free-standing hot tub to stay warm on those chilly nights or enjoy time with family and friends. Or get a grill so you can enjoy some sizzling food in the spring sun.

A fire pit surrounded by comfortable seating creates a great spot to gather with friends and family. There are fire pit designs for every possible taste and preference – from bricks and concrete to metal.

Secluded Paradise

We all need a getaway from time to time. You can create a secluded area that feels warm and cozy in your own backyard. Natural landscaping creates the perfect backdrop for your backyard. You can add a few wicker chairs and a matching end table that mimic the surrounding landscape to enjoy your peaceful retreat for hours.

Plants are a flexible, quick, and budget-friendly way to update your outdoor design each season. Adding vines to a pergola or fence softens the space while adding variety and interest. For a splash of color, consider potted plants that give you the flexibility to replace depending on the season or your color palette.

Utilize fencing.

A fenced-in backyard gives you privacy from street traffic and neighbors. Instead of a solid fence, choose a style that is more open. It will make your backyard seem larger. A lattice fence is perfect for small backyards.

Think Small

Pieces with thin frames and petite bodies make a small space feel roomier. Compact bistro sets are perfect for a garden corner or porch. Built-in benches will maximize seating and storage in minimal space.

Light It Up

Lighting plays a major role in how space feels. So incorporate both task and ambient lighting to create the mood you want and to provide the amount of light you need.

Create Ambience

Now that your backyard is looking like it should, take the extra steps to turn it into a place you will want to spend time in. If you don’t have appropriate garden lighting, there is cheap solar lighting that is easy to install.

A water feature adds good feng shui and if you don’t have appropriate garden furniture, there is attractive plastic garden furniture that is virtually maintenance-free, resistant to the elements, and easy on the pocket.

Also, comfy outdoor living requires shade, so make sure to include a sun umbrella, canopy, or pergola above any seating area.

Have any questions about creating your perfect backyard? Contact the experts here.

The Early Bird Tent Sale Extended

patio

We’ve extended your chance to grab the best deals of the season at Cincinnati Pool & Patio! 

Find 75% off all patio furniture, all clearance items, and scratch-n-dent items April 2nd through April 8th! 

EXTENDED EARLY BIRD TIPS

COMFORT

Comfort is important — very important. You may want steel or wood construction in your patio furniture for stability and longevity, but don’t forget that without some homey comforts like soft, plush cushions, your outdoor furniture will go largely unused. Avoid pancake cushions. You know, those thin, puny little cushions that aren’t plush or even very pliable. Opt for chubby cushions that feel light when you pick them up. Look for cushions with polyester filler, too. The more lightweight and springy the filler is, the more quickly it will dry out after exposure to moisture. That means it will resist mold and mildew and stay comfortable and sweet-smelling longer.

TEXTILES

You can’t grab a pillow from your family room and expect it to adapt to life outside on the patio. Most textiles designed for indoor/outdoor use are made from all-weather materials that repel water or encourage moisture to evaporate quickly by remaining porous.

Fabrics designed for use outdoors are usually fade resistant and UV protected, too. They’ll look good and feel soft and comfortable for at least a couple of seasons. When you’re evaluating fabrics for outdoor furniture, check cushion seams for heavy-duty thread and consistent, even stitches. Choose cushions with vents that encourage airflow and quick drying.

Invest in furniture with cushions that can be unzipped and taken apart for periodic airing, repair or replacement. It’s also a good idea to buy outdoor furniture outfitted with cushions you can turn and flip. This will help them retain their shape, dry more quickly and fade evenly. Acrylics, polyester, treated canvas, and the cotton duck is all comfortable, durable fabrics used in the construction of outdoor furnishings. Look for them in upholstered items, cushions, pillows, curtains, blinds and umbrellas.

CONVENIENCE AND QUALITY

From sloppy welds to cracked casters to amateurish paint finishes, a close inspection will expose that great outdoor furniture bargain for what it is — a bad buy that probably won’t last until next season. There are a couple of important lessons here: It’s easy to think of outdoor furnishings as somewhat less important than the stuff you buy for indoor use. The reverse is often true. What you buy to use outside has to stand up to sun exposure, wind, rain and probably some roughhousing, too. Inspect every piece you’re considering for flaws, especially if the deal sounds too good to be true. This is one area where a higher price is often a good indicator of better quality.

Check out our list of patio furniture here! 

If you have any questions about patio furniture or the sale, contact us here!

Outdoor Fireplaces: Everything You Need To Know

outdoor fireplaces

Outdoor Fireplaces: Everything You Need To Know

During the spring and summer, we like to spend as much time as possible outside. But sometimes the nights and evenings can be too chilly to fully enjoy our backyard and outdoor living space. Fortunately for us, many options cannot only add warmth to those days that “look” warm and inviting, but can also provide hours of family activities and bonding. These options are outdoor fireplaces, fire pits, and patio heaters.

Outdoor firepits and propane patio heaters range in style from a simple outdoor fireplace to those that add an elegant accent to an already classy backyard area. Whether you’re looking for a way to enhance your backyard with a cozy fire or to warm up your patio or deck, you can follow these tips on choosing the best outdoor heating solution for your family’s needs.

Outdoor Fireplaces and Fire Pits

There’s nothing like a fire pit to provide countless hours of outdoor fun, family time, and s’ mores! Overall, pool and patio firepits are relatively simple – they allow you to enjoy an open fire in your outdoor living spaces. That being said, there are a few important things to know.

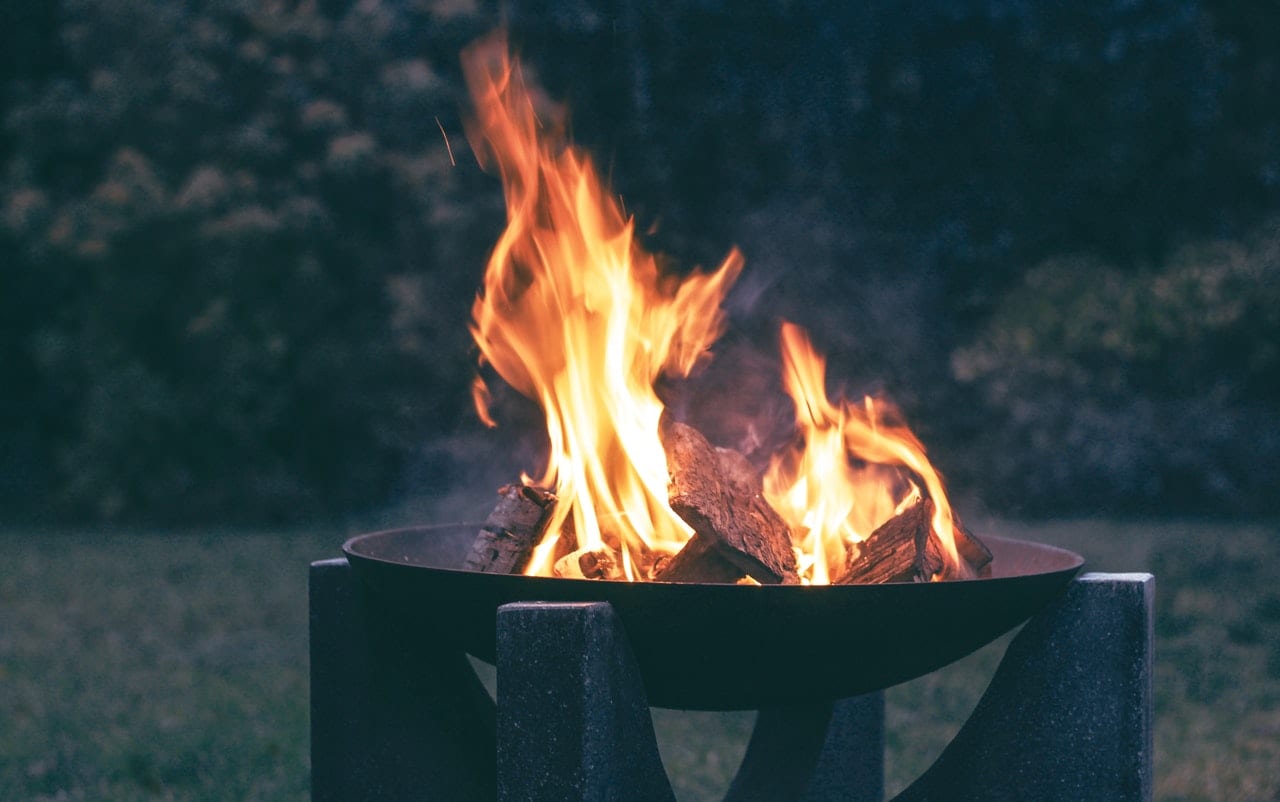
The first thing to consider is what type of fuel you want to use in your fire pit – gas or wood. While wood is the preferred fuel because nothing compares to the smell and sound of a real campfire, some people may just want the heat without the fuss of starting and keeping a fire going.

Second, you need to find the fire pit that best goes along with the rest of your backyard decor. Fire pits come in a variety of different sizes and shapes as well as materials used to build them. As a fire pit fanatic, I recommend looking for a bowl that is built from weather-resistant materials such as copper, stainless steel, or iron. While they may be a bit more expensive, you are getting your money’s worth. The better the fire bowl is built, the longer it will last, and look good too!

Finally, make sure your fire pit has a sturdy cover. While it may seem silly to place a mesh fire screen in the pit while the fire is going, it very well may protect you and your home from jumping sparks like the fire crackles. Also available are off-season covers, to keep your grill clean and dry during times of non-use.

Fire Bowls

This is a good time to explain the difference between a fire pit and fire bowls. Firebowls are usually placed in the corners of pools, or next to a spa. More for accent, less for heat, fire bowls are usually a concave concrete design, filled with river rock. Equipped with a gas line and connected to propane or natural gas source, fire bowls produce a small, adjustable flame. Firepits are a larger affair, not quite a bonfire, but enough to produce some heat and a cooking source.

Outdoor Fireplaces and Patio Heaters

There are many options to consider when shopping around for the perfect patio heater. To start, there are three different types of outdoor patio heaters: propane patio heaters, lamp-style heaters, and infrared heaters.

Propane Patio Heaters

Propane patio heaters are great for backyards and decks. Instead of having to worry about plugging them into an outlet, they are 100% self-sufficient. A propane tank is stored within the base and the heat is completely adjustable. These patio heaters are usually completely metal and are equipped with a safety shut-off – in case the heater ever gets tipped over.

Lamp-Style Patio Heaters

Instead of using propane, Lamp-Style Patio Heaters are powered by 1200 watt halogen light bulbs. All they require is a 120v grounded outlet! Like the propane heaters, they are also equipped with safety shut-offs. That being said, regardless of their height, they can both heat an area up to 12ft diameter – since they are powered by the same halogen bulbs. Lamp-style patio heaters usually consist of a resin body with a steel hood and feature weather-resistant hardware. These very stylish table heaters can add look and a feeling of warmth to your patio or deck.

Infrared Patio Heaters

Infrared patio heaters use infrared waves to directly heat the object or person that they are pointed at. They cost substantially less to operate than propane patio heaters and have no warm-up time. Acting much like an outdoor lamp, they can either be plugged into a 120v grounded outlet. They come in two different varieties: wall-mounted heaters and umbrella-mounted heaters. They require no gas or open flames and since they are permanently installed, you don’t have to worry about storing them when they’re not in use.

Have any questions about outdoor fireplaces? Contact us here!